
I have been a licensed esthetician for nine years, and the number-one question I hear in my treatment room is some version of: I want to try retinol but I am scared to wreck my skin. That fear is not irrational. I have seen clients who went all-in with a prescription-strength retinoid on week one and spent the next month dealing with peeling, burning, and a compromised barrier that took longer to fix than the original concern would have. Starting retinol does not have to go that way. Done right, it is one of the most rewarding things you can add to a nighttime routine. The key word is done right.
This guide walks through the exact protocol I give to clients who are new to retinol. Seven steps, in order. No rushing the timeline, no skipping the boring parts. The product I recommend as a starting point is the CeraVe Resurfacing Retinol Serum (ASIN B07VWSN95S) because it has a built-in buffer: ceramides and niacinamide in the formula help offset the irritation that plain retinol serums can cause. It is also at a concentration suitable for beginners and is available without a prescription. I will reference it throughout, but the principles here apply to any over-the-counter retinol.
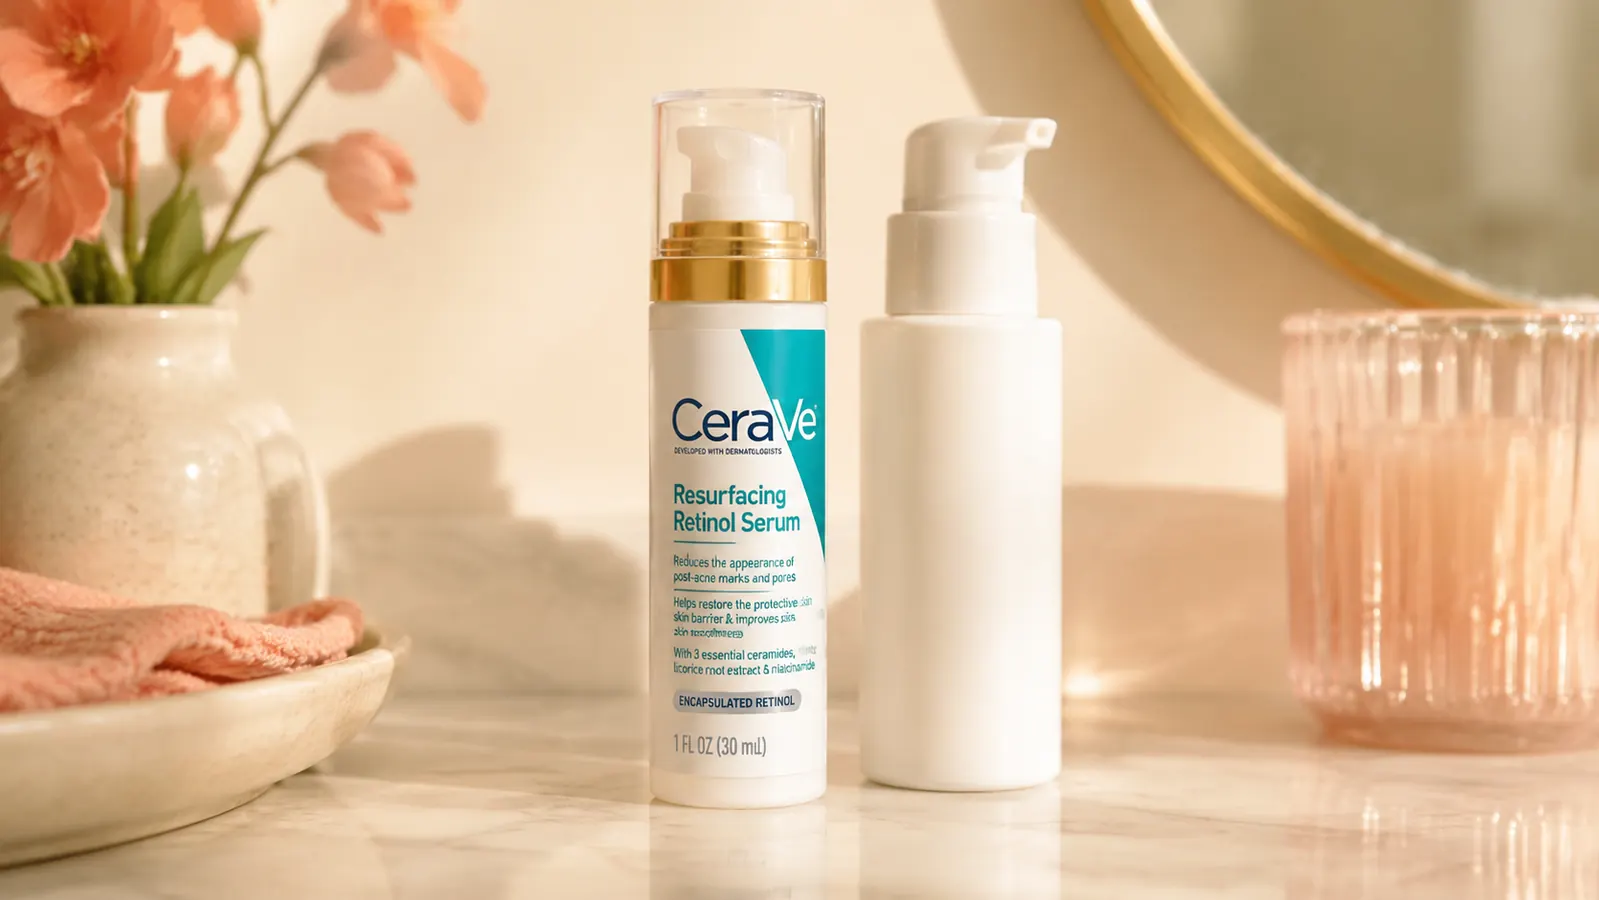
If you keep putting off retinol, this is the one to start with
The CeraVe Resurfacing Retinol Serum pairs encapsulated retinol with ceramides and niacinamide, which makes it significantly gentler than bare retinol formulas. It is the product I hand clients when they say they want results but are not ready for a full-strength introduction.
Amazon Check Today's Price on Amazon →Why Retinol Is Worth the Learning Curve
Retinol is a vitamin A derivative that works by speeding up cell turnover, which means your skin sheds old surface cells faster and replaces them with newer, smoother ones. That process supports collagen production, helps fade post-acne hyperpigmentation, refines pore appearance over time, and smooths out uneven texture. These are not cosmetic tricks. They represent actual structural changes at the skin level, which is why dermatologists have recommended retinoids for decades.
The catch is that faster cell turnover also means your skin has to adjust. In the first four to six weeks, you may see dryness, mild flaking, or a temporary uptick in breakouts. That is normal. It is not your skin rejecting retinol. It is your skin recalibrating. The steps below are designed to slow that adjustment period down so it is manageable rather than miserable.
Step 1: Patch Test Before Your First Full Application
A patch test takes two minutes and can save you a week of unnecessary inflammation. Apply a small amount of the retinol serum to the inside of your wrist or behind one ear. Leave it on overnight. Check the area the next morning and again 48 hours later. What you are looking for is prolonged redness, a raised rash, or any burning that lasts more than a few minutes after application. Mild warmth right after applying is common and usually fades quickly. A true sensitivity reaction tends to stick around and worsen.
If the patch test is clean, move to your face on the next application night. If you see a prolonged reaction, that particular formula is not the right fit. Not every retinol product works for every skin type, and finding that out on your wrist is far better than finding it out across your full face the night before work.
Step 2: Start at 2 Nights Per Week, Not Every Night
The biggest mistake I see from clients who are eager to get results is going nightly from day one. Your skin's barrier needs time to acclimate to increased cell turnover. Starting at two nights per week, with rest nights in between, gives the skin time to recover before the next application. Think of it as training, not deprivation. You are not doing less. You are building tolerance so you can do more, consistently, without setbacks.
A workable starting schedule: apply on Sunday and Wednesday evenings for the first two weeks. If your skin responds well, add a third night in week three. From there, add one night every two to three weeks based on how your skin feels. The goal over 8 to 12 weeks is to reach nightly use if your skin allows it, but there is no shame in staying at four to five nights per week indefinitely. Consistency matters more than frequency.
Step 3: Buffer With a Moisturizer on Sensitive Nights
Buffering is the technique of applying a thin layer of moisturizer to slightly damp skin before putting on your retinol. The moisturizer dilutes the rate at which retinol penetrates, which means a gentler delivery without eliminating the active ingredient entirely. This is especially useful in the first four to six weeks, or on nights when your skin feels dry or reactive.
The method: cleanse, pat dry until skin is still slightly damp, apply a light layer of a simple ceramide-based moisturizer, wait 60 to 90 seconds, then apply the retinol serum on top. Over time as your tolerance builds, you can apply retinol to fully dry skin without the buffer layer. If you want to read more about which moisturizers support a retinol routine, I cover the La Roche-Posay Toleriane Double Repair in depth in its own review, and it pairs well with this approach.
Step 4: Use a Pea-Sized Amount for Your Entire Face
A pea-sized amount. That is it. It is probably less than you think it is. Retinol does not work proportionally to how much you apply. More product does not mean faster results. It means higher concentration on the skin surface, which raises the risk of irritation with no benefit to outcomes. A pea-sized pump or squeeze is enough to cover the forehead, both cheeks, the nose, and the chin. Warm it between your fingertips first, then press it gently into skin rather than rubbing.
Avoid the eye area entirely unless the product is specifically formulated for that zone. The skin around the eyes is thinner and more reactive, and most over-the-counter retinols will cause excessive irritation there. The CeraVe Resurfacing Retinol Serum is not labeled for eye use, so stop about half an inch from the lower lash line. If fine lines around the eyes are a priority, that is a separate product category worth discussing with a dermatologist.
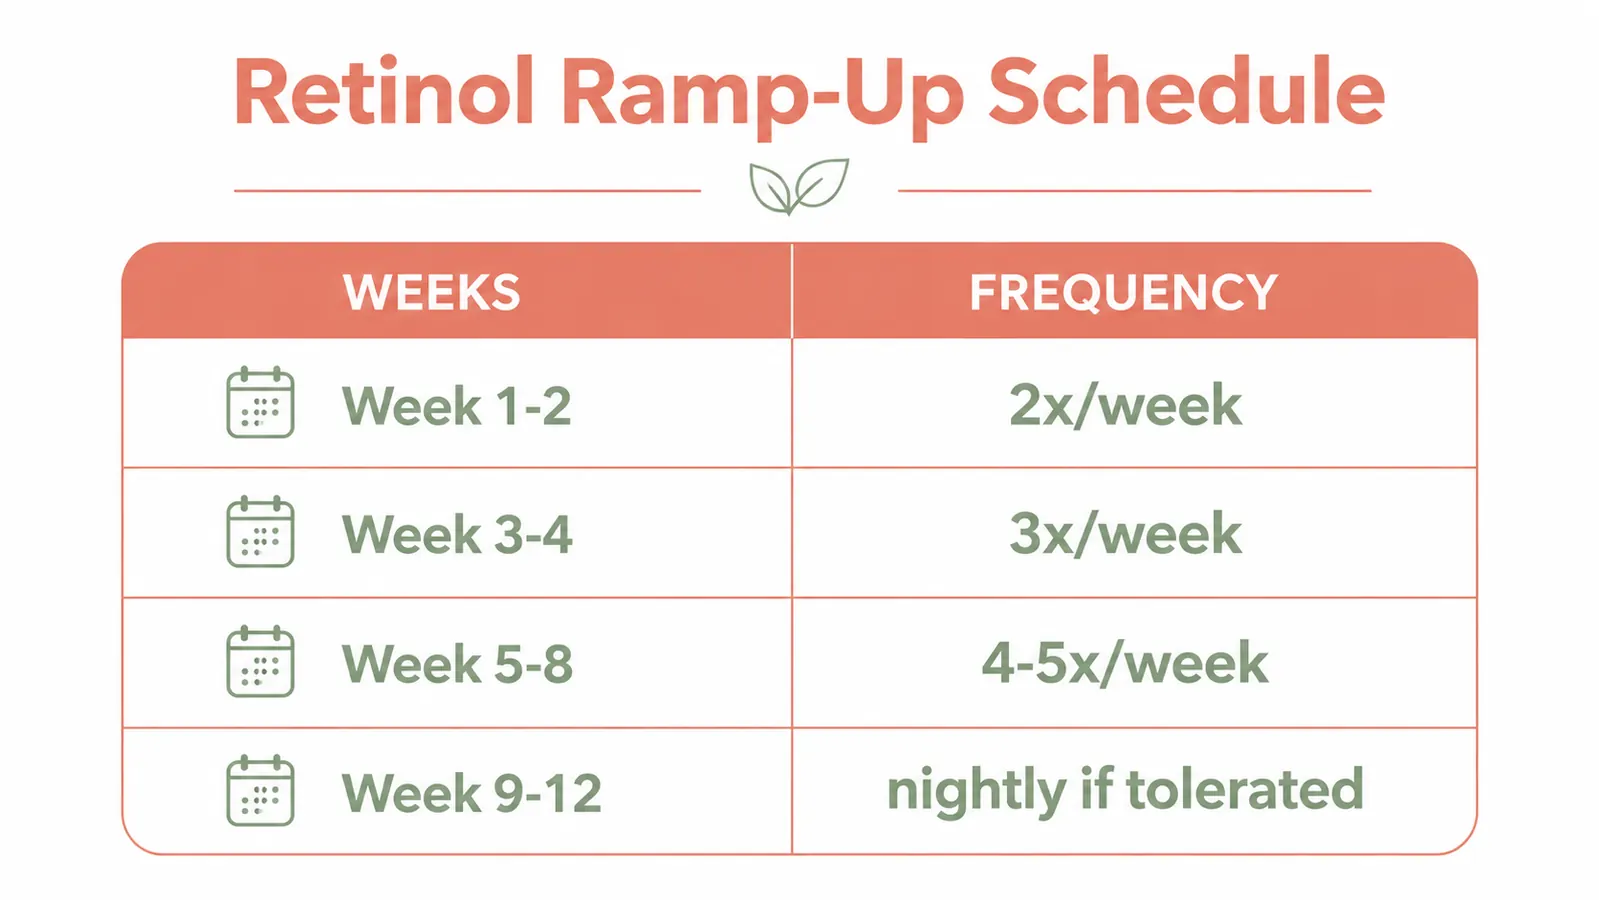
Step 5: Build to Nightly Use Over 8 to 12 Weeks
The ramp-up timeline I give most clients looks like this: weeks one and two at two nights per week, weeks three and four at three nights per week, weeks five through eight at four to five nights per week, and weeks nine through twelve testing nightly if the skin is comfortable. That is the full arc. Some people get to nightly by week eight. Some stay at four nights and see excellent results. The timeline adjusts based on your skin's feedback, not a marketing promise.
During this ramp-up phase, keep the rest of your routine simple. Gentle cleanser, the buffer moisturizer, retinol, and then another layer of moisturizer on top if needed. Avoid adding new products during this window. If you introduce a new cleanser and a new exfoliant and a new serum all at once, you will not know what caused a reaction if one shows up. Retinol deserves its own onboarding period without competition from new variables.
The ramp-up is not a delay. It is the whole strategy. Skin that adapts slowly tends to hold its gains. Skin that is pushed too fast tends to revolt, and getting back from that costs more time than the shortcut saved.

Step 6: Apply SPF Every Morning Without Exception
Retinol increases photosensitivity. Your skin is turning over cells faster, which means the newer cells surfacing are less hardened against UV exposure. Skipping SPF while using retinol is not a minor oversight. It actively undermines the results you are working toward. UV exposure causes the same hyperpigmentation and collagen breakdown that retinol is working to address. Using retinol without SPF is like filling a glass with one hand and pouring it out with the other.
The SPF does not need to be expensive or elaborate. A broad-spectrum SPF 30 or higher applied every morning as the last step before going outside is the standard. Reapply every two hours if you are outdoors for extended periods. This is non-negotiable while using any retinoid. I tell every client the same thing: if you will not wear SPF daily, hold off on retinol until you are ready to pair them. The skin damage from unprotected sun exposure on retinol skin cancels the benefits.
Step 7: Know the Difference Between Purging and Irritation, and When to Take a Break
This step trips people up more than any other. The skin will do things in the first four to six weeks that feel alarming, and knowing how to read what is happening determines whether you push through or pull back.
Purging is a temporary increase in breakouts caused by accelerated cell turnover bringing congestion to the surface faster than it would have arrived on its own. Purge breakouts tend to appear in areas where you already break out, come and go quickly (faster than your normal breakout cycle), and self-resolve within four to six weeks of consistent use. They are not fun, but they are a signal that the retinol is working.
Irritation looks different. It presents as redness that does not fade, a stinging or burning sensation that lasts more than a few minutes after application, dry flaking that does not improve with moisturizer, or breakouts appearing in areas of your face where you never break out. Irritation is not progress. It is a signal to step back. If you are experiencing it, drop your frequency immediately. Go back to two nights per week, add the buffer layer, make sure you are using only a pea-sized amount, and give the barrier two full weeks to recover before trying to ramp up again.
If irritation persists despite scaling back, stop using the product for two weeks and focus only on barrier repair: gentle cleanser, a ceramide moisturizer twice daily, and SPF in the morning. Once the skin feels calm again, reintroduce retinol from scratch at the lowest possible frequency. Some people simply need a lower concentration than what an OTC product provides, and that conversation belongs with a dermatologist.
What Else Helps: Supporting Your Routine During the Introduction Period
A few things make the ramp-up go smoother. First, use a gentle cleanser that does not strip the skin. Foaming cleansers with sulfates can disrupt the skin barrier on their own, and combining that disruption with retinol increases the chance of irritation. A cream or gel cleanser that leaves skin feeling comfortable, not tight, is the better pairing. Second, skip actives on your retinol nights. Vitamin C, AHAs, BHAs, and benzoyl peroxide all work differently in the routine, and using them on the same night as retinol stacks the potential for irritation without stacking the benefit. Use them on alternating nights. Third, a ceramide-forward moisturizer used on top of retinol after the serum absorbs acts as a seal that holds hydration in and limits transepidermal water loss, which is a major driver of retinol-related dryness. You can read more about that in my deep-dive on the CeraVe Retinol Serum's long-term results to understand how the ceramide pairing works in practice.
If you want specifics on post-acne mark fading and what to realistically expect over 90 days, the article on 10 ways retinol serum fades acne marks covers that timeline in detail. The process is slower than people hope but more durable than most actives deliver.
Ready to start? This is still the gentlest entry point at the drugstore price
The CeraVe Resurfacing Retinol Serum has over 55,000 Amazon reviews, retails at a drugstore-accessible price, and has ceramides and niacinamide built into the formula to reduce the adjustment friction that plain retinol serums create. It is what I recommend to clients who are nervous about starting retinol for the first time.
Amazon Check Today's Price on Amazon →