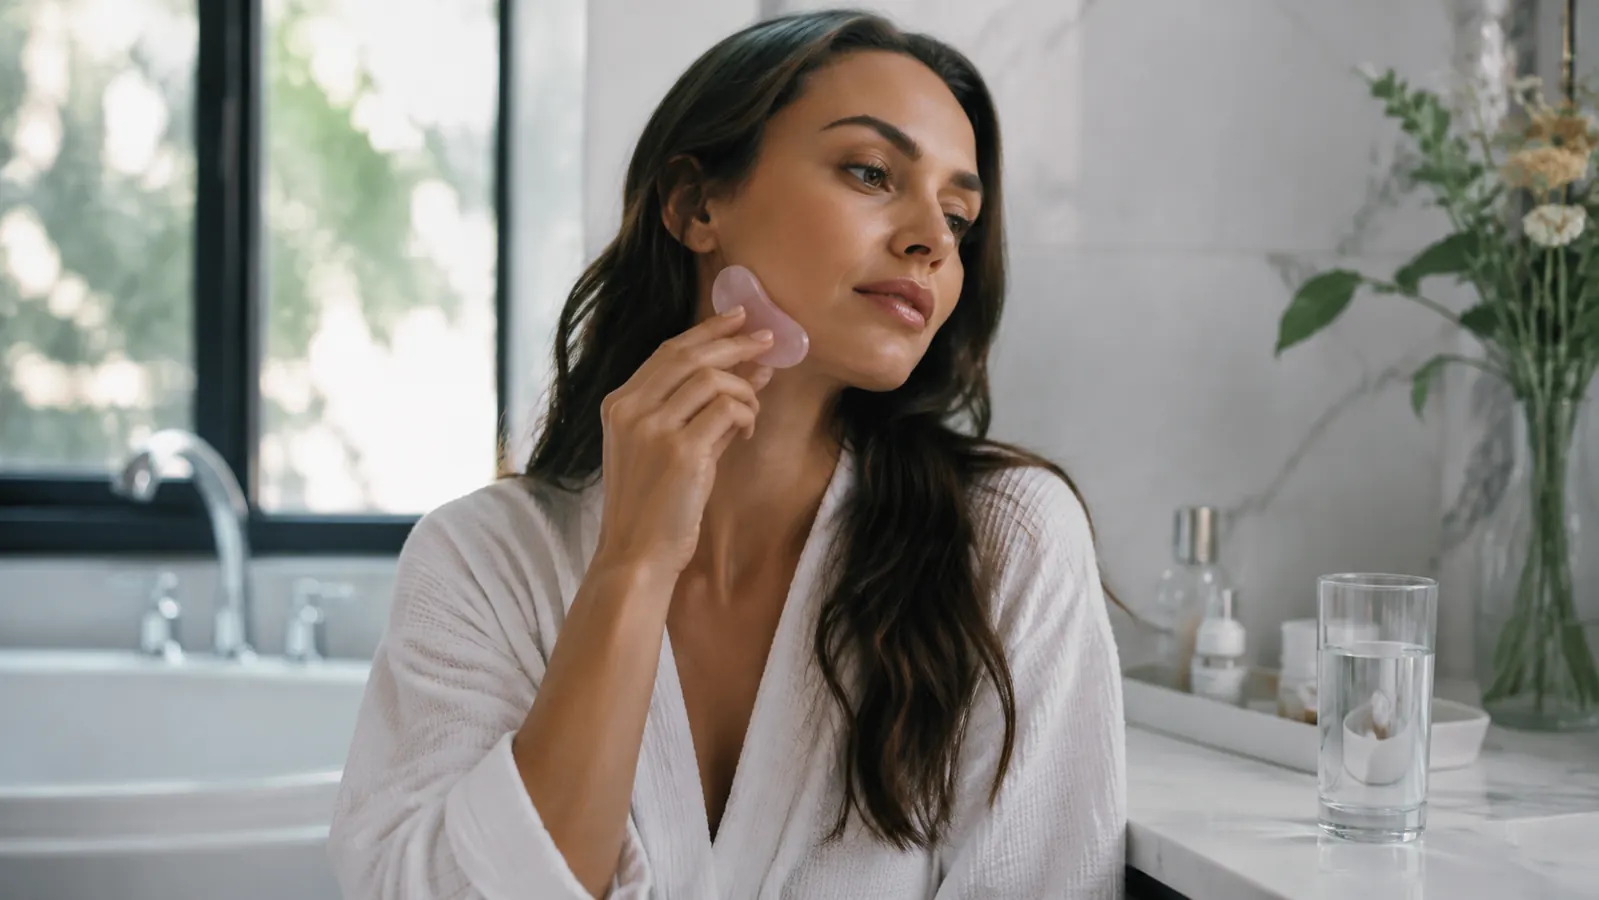
Every morning for the past three years, I have started my skincare routine with five minutes of gua sha before I put on a single active ingredient. Not because it is a ritual or a trend, but because it is the one thing I can point to that consistently reduces the puffiness I wake up with around my jaw and under my eyes. I am a licensed esthetician. I tested this tool on my own face for weeks before I started recommending it to clients. What I found is that most people who try gua sha and quit do so because someone gave them bad technique, not because the tool does not work.
The most common mistake I see is using gua sha directly on bare, dry skin. The second most common is using too much pressure, or dragging the stone back and forth instead of always moving in one direction. Both mistakes will leave you with irritated skin and zero depuffing. This guide fixes all of that. I will walk you through the exact seven-step sequence I use and teach to clients, including the correct oil or serum to apply first, the tool angle that makes or breaks the whole technique, and the two situations where you should skip gua sha entirely.
If your face looks puffy before you leave the house, this is the tool that fixes it in 5 minutes.
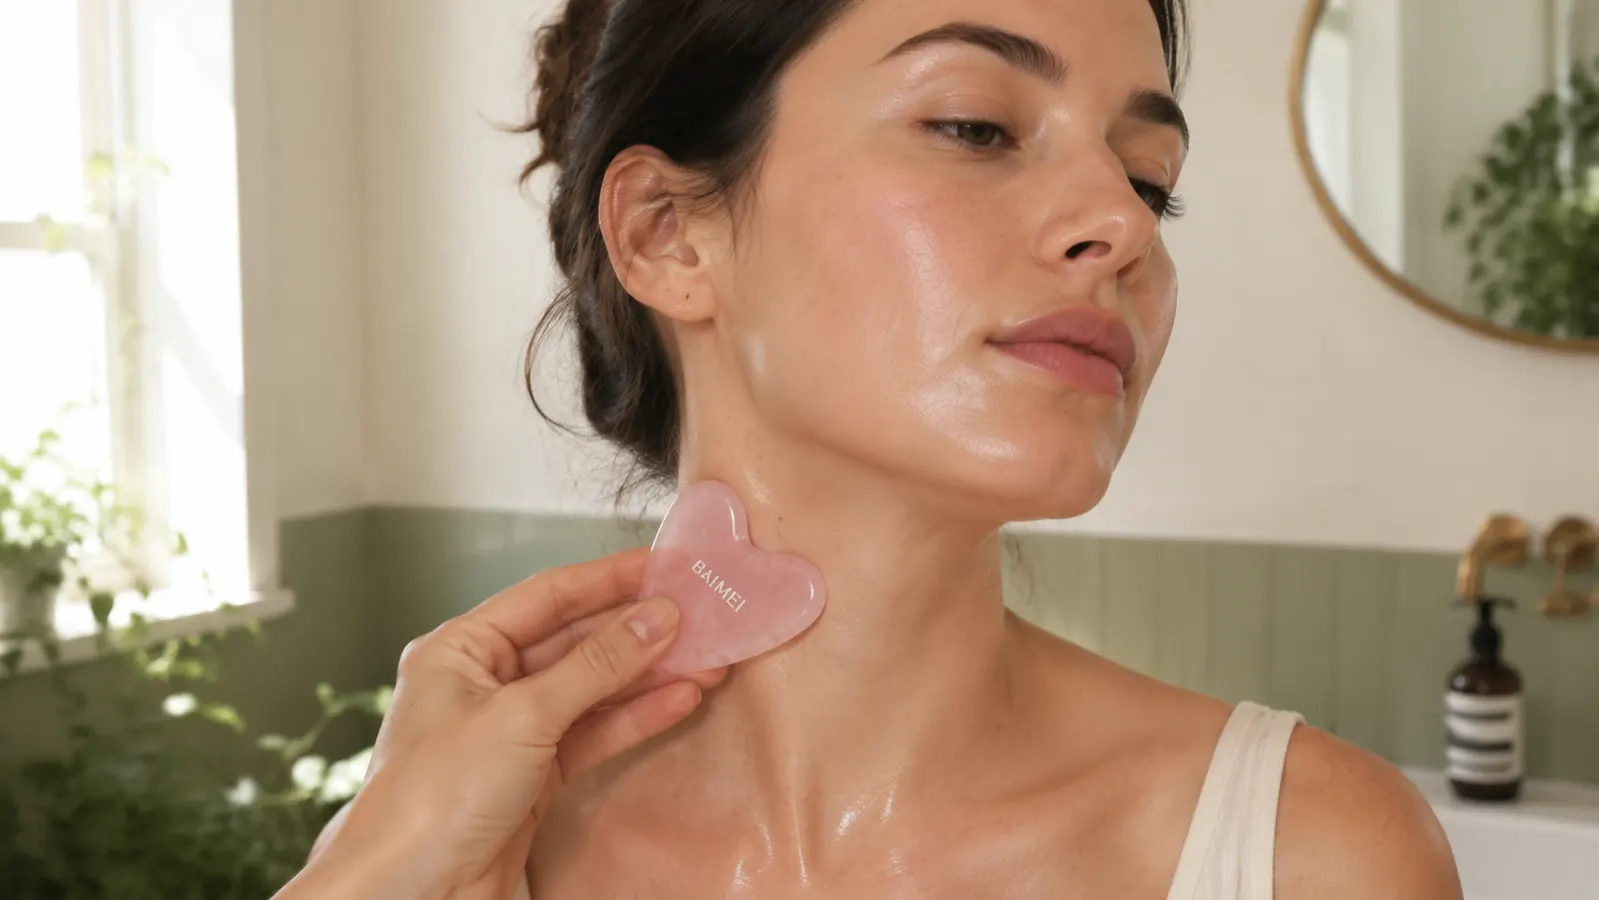
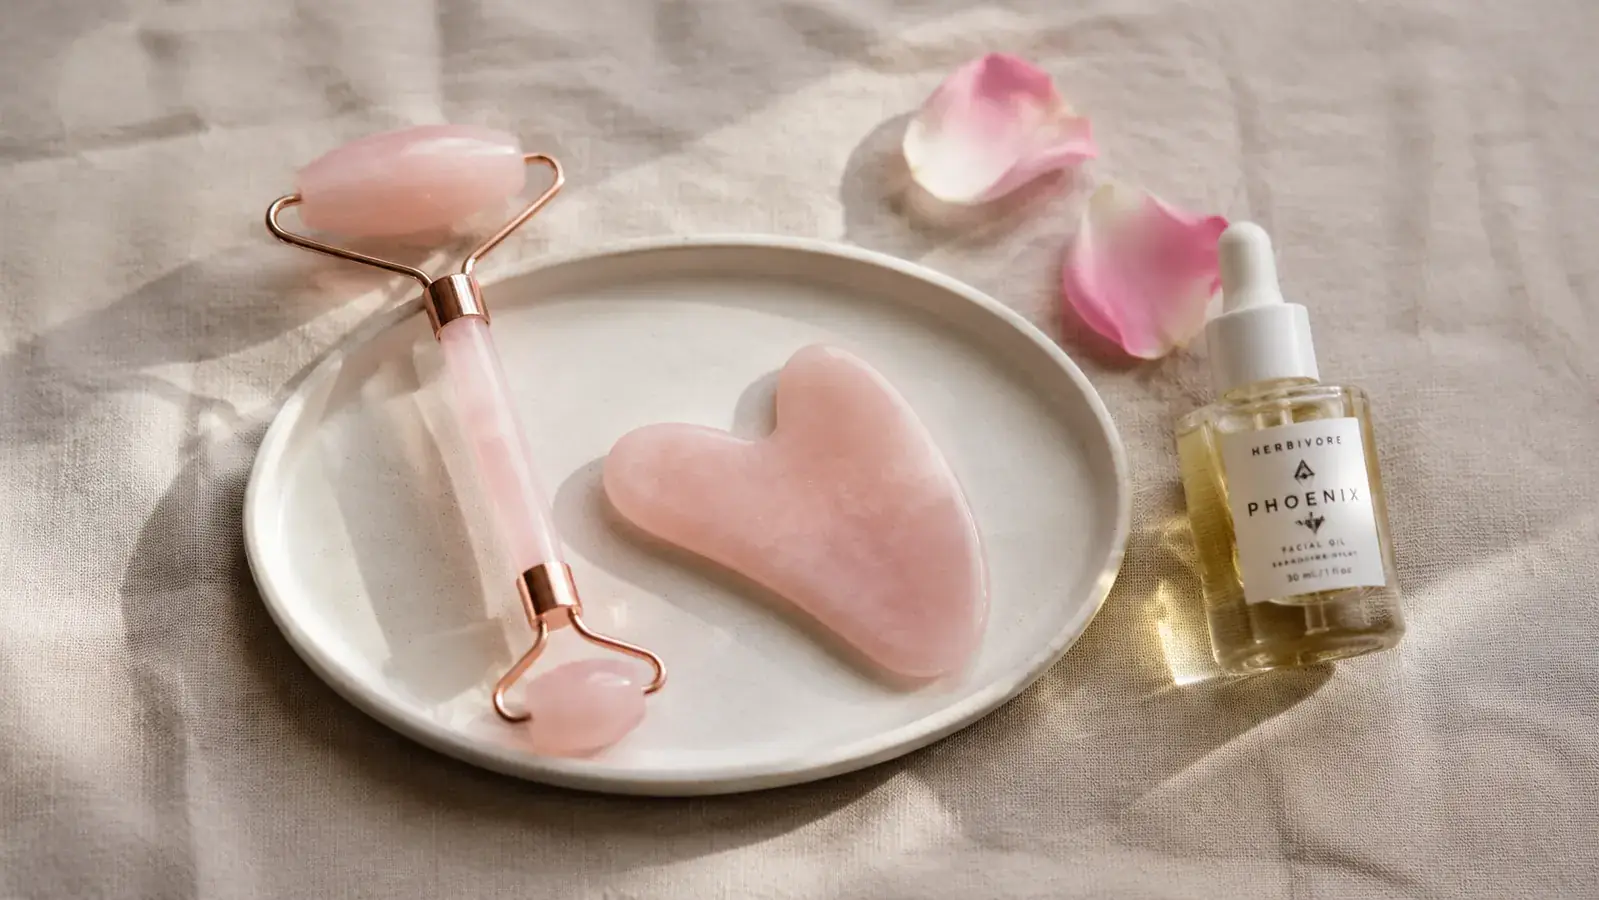
I use the BAIMEI Rose Quartz Roller and Gua Sha Set. It comes with both a gua sha stone and a face roller, it is made from real rose quartz, and it costs less than a single sheet mask subscription box. The shape of the stone is well designed for every zone covered in this guide.
Amazon Check Today's Price on Amazon →What Gua Sha Actually Does (and What It Does Not Do)
Gua sha is a manual technique that moves lymphatic fluid, releases tension in the facial muscles, and improves local circulation. The depuffing effect comes from the lymphatic drainage component. When you sleep, fluid pools in the soft tissue of your face because you are lying flat and not moving. Lymphatic vessels do not have their own pump the way blood vessels do. They rely on muscular movement and manual pressure to keep fluid moving. Gua sha provides that movement in a targeted, controlled way.
What gua sha does not do: it does not slim your face permanently, it does not replace a retinol serum, and it does not reduce under-eye circles caused by genetics or lack of sleep. The results you will see consistently are reduced morning puffiness (especially in the jaw, cheeks, and under-eye area), a subtle lifting appearance from released muscle tension, and improved serum absorption because you are moving product into the skin rather than letting it sit on top. That is a meaningful list of benefits for five minutes of effort.
The One Thing You Must Do Before You Touch Your Face With the Stone
You must never use gua sha on bare, dry skin. The tool needs slip to glide across your face without dragging or pulling the skin. Dragging without slip causes micro-tears in the surface layer, which leads to broken capillaries over time on delicate areas like the cheeks and under-eye zone. This is the rule I am most strict about with clients.
The best options for slip are a lightweight facial oil or a hydrating serum with a gel or watery texture. I like a jojoba or squalane oil for drier skin types because the stone glides beautifully and the oil absorbs fully within minutes. For oily and combination skin, a hyaluronic acid serum with a slick, watery texture works well. Apply enough that your skin looks lightly glistening but not greasy. Two to three drops of oil or a pea-sized amount of serum is usually right for the whole face and neck. Apply it immediately before you start your gua sha sequence so it has not had a chance to absorb yet.
One more pre-session note: store your gua sha stone in the refrigerator overnight. A cold stone amplifies the depuffing effect because the low temperature causes blood vessels near the surface to constrict slightly, which reduces visible puffiness faster. The BAIMEI rose quartz stone stays cold for a good five to eight minutes after you take it out of the fridge, which is enough time to complete this entire sequence.
The 7-Step Gua Sha Sequence for Depuffing
The sequence below follows the lymphatic drainage pathway from the face downward toward the collarbone, which is where lymph nodes are concentrated and where fluid drains out of the facial tissue. You always work downward and outward, never back toward the center of the face. Keep your strokes unidirectional. Never drag the stone back and forth in the same path. After each set of strokes, lift the stone and return it to the starting position before your next stroke. Total time is four to five minutes.
Step 1: Apply Your Oil or Hydrating Serum First
Before you pick up the stone, make sure your slip layer is in place. Dispense two to three drops of facial oil or a pea-sized amount of hydrating serum onto your fingertips and press it evenly across your face and neck, from your collarbone up to your forehead. You want the whole surface covered so the stone can move freely in any direction without catching.
If you wear your gua sha stone directly from the fridge, take it out now and let it sit for thirty seconds before pressing it to your face. This prevents any shock to your skin from extreme cold contact and also gives you time to spread your oil evenly. Once your skin is prepped and the stone feels pleasantly cool rather than painfully cold, you are ready to begin.
Step 2: Start at the Neck (Lymphatic Drainage Toward the Collarbone)
Always start at the neck, not the face. The lymphatic system drains downward toward the collarbone. If you start at the face without opening the drainage pathway at the neck first, you are pushing fluid toward a closed valve. Starting at the neck opens the pathway so everything above it can drain more efficiently.
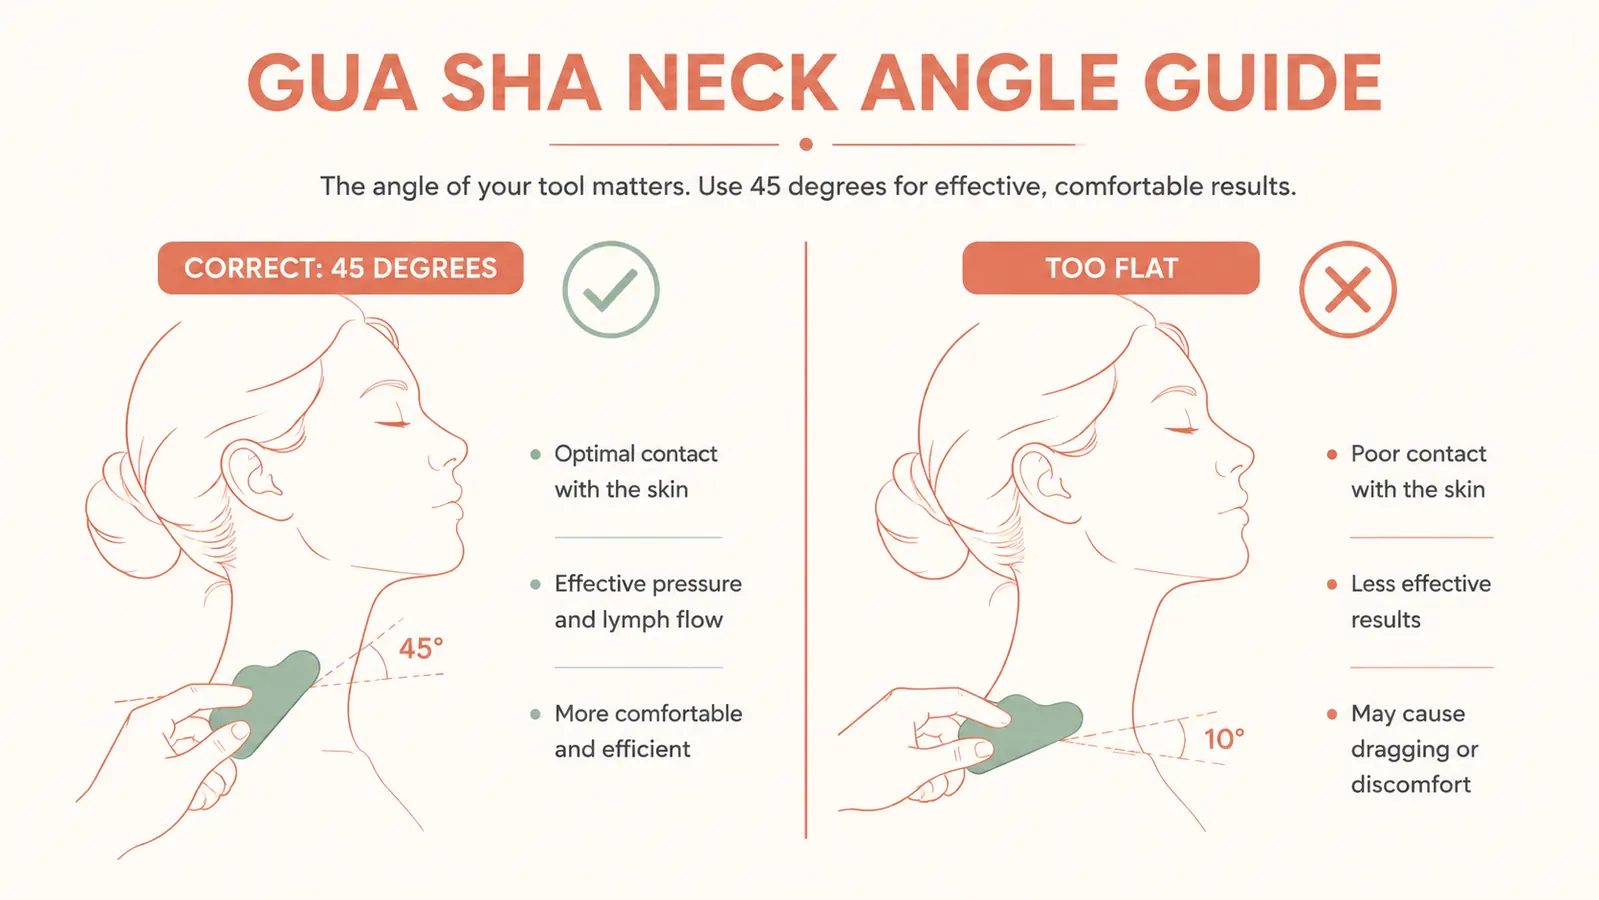
Hold the gua sha stone flat against the side of your neck, just below your ear, with the long curved edge of the stone against your skin. Tilt it to a 45-degree angle away from your skin surface. Apply light pressure, enough to feel the stone making contact but not enough to cause any discomfort or redness. Stroke downward in one smooth motion toward your collarbone. Repeat five times on each side. Use the same gentle, deliberate pace throughout. The pressure here should feel like a firm massage, not a scraping sensation.
Step 3: Jawline (Gua Sha Edge, Light Pressure, Ear to Chin)
The jawline is where most people carry visible tension and puffiness that builds overnight. Position the curved edge of the stone at your earlobe and hold it at the 45-degree angle. Stroke along the underside of your jawline from your ear toward your chin in one smooth motion. This direction moves fluid from the central face outward toward the ear, where it then drains down the neck pathway you already opened.
Do five strokes on one side, then switch to the other side before moving up the face. Keeping the sequence symmetrical prevents one side of your face from looking more worked than the other. If you have jaw tension from clenching at night, you may feel mild tenderness along the masseter muscle here. That is normal and a sign that the muscle is tight. Keep the pressure light and let the stone do the work rather than pushing harder.
Step 4: Cheekbone Sweep (Inner Cheek to Ear)
For the cheeks, place the flat curve of the stone at the outer edge of your nose, just below your cheekbone. Angle the stone at 45 degrees and sweep outward along the top of the cheekbone toward your ear in one smooth, upward-angled stroke. This follows the cheekbone contour and moves any fluid pooled in the mid-face outward toward the ear. Five strokes per side.
This step also has the secondary effect of creating a subtle lifting appearance because you are stimulating the zygomaticus muscles along the cheekbone. You will not see dramatic sculpting from five strokes, but over several weeks of consistent practice, my clients consistently report their face looking less flat and more defined in this area. I think of it less as a beauty treatment and more as a facial maintenance practice, the same way stretching maintains muscle flexibility.
Step 5: Under-Eye Depuff (Use the Small Roller End, Inner Corner to Temple)
The under-eye area is too delicate for the gua sha stone. The skin here is the thinnest on your face, roughly 0.5 millimeters compared to 2 millimeters elsewhere, and it has minimal subcutaneous fat to protect the capillaries underneath. Using the gua sha stone under the eye with any meaningful pressure risks broken capillaries, which are permanent and appear as tiny red or purple lines under the skin.
This is where the small roller end of the BAIMEI set becomes the right tool. Switch to the small rose quartz roller and place it at the inner corner of your eye, right at the bridge of your nose. Roll outward toward your temple using absolutely zero downward pressure. You are just letting the weight of the roller make contact with the skin. Three to four slow passes per side. The cold stone does the heavy lifting here. You are moving the fluid, not pressing it out.
Step 6: Brow Lift (Gua Sha Notched Edge, Brow to Hairline)
Switch back to the gua sha stone. Most gua sha tools have a notched edge, which is the section with a small concave curve, and it fits perfectly along the brow bone. Nestle that notched edge under your eyebrow, starting at the inner corner of your brow, and use an upward sweeping stroke from the brow line toward your hairline. You are lifting through the frontalis muscle, which runs from the brow to the hairline, and releasing any tension that has built up from squinting or furrowing.
Do five strokes moving from the inner brow toward the outer corner of the brow, then finish with two or three upward strokes from the outer brow toward the temple. This is my favorite step in the sequence. My clients who carry stress in their forehead notice the most immediate tension release here, and it shows. The forehead looks smoother and less compressed after this step, especially first thing in the morning.
The lymphatic system drains downward. If you start at your face without opening the drainage pathway at the neck first, you are pushing fluid toward a closed valve. Always start at the neck.
Step 7: Finish at Temples and Behind the Ears
The final step is a short closing sequence at the temples and behind the ears. Use the flat curved edge of the stone to make three slow strokes from the outer corner of each eye back toward the hairline at the temple. Then press the stone gently behind each ear and make three short downward strokes toward the side of the neck. You are directing all the fluid you have moved during the sequence toward the primary lymph nodes located behind the ears and along the sides of the neck. This is the exit point for facial lymph drainage.
The whole sequence takes about four and a half minutes once you know it. The first few mornings will be slower while you build muscle memory for the stroke directions and angles, but by the end of the first week it will feel completely automatic. I do this while standing at my bathroom counter right after cleansing and before applying any active serums. The oil or serum I used as my slip layer absorbs during the sequence, so I do not need to wipe anything off before layering the rest of my routine on top.
What Else Helps Get the Most From Gua Sha
Consistency matters more than intensity. Five minutes every morning will produce better cumulative results than a twenty-minute session twice a week. The lymphatic drainage effect builds over time as the tissue becomes accustomed to the regular movement. I noticed the most obvious change in my clients at around the three-week mark, when the baseline morning puffiness they started with was noticeably lower than it had been before they started the practice.
Clean your stone after every use. Rose quartz is porous enough to hold onto bacteria if you let product residue sit on the surface overnight. Rinse the stone under warm water immediately after your session and let it dry on a clean towel before putting it back in the fridge. If you notice buildup, a drop of gentle cleanser on a cloth cleans the surface without scratching the stone. The BAIMEI set's rose quartz holds up well to this routine. I have been washing mine daily for three years and the surface is still smooth.
When to Skip Gua Sha
There are two situations where you should not use a gua sha stone. The first is active acne, meaning inflamed, raised, or pustular breakouts. Dragging a stone across an active breakout spreads bacteria to surrounding pores and can turn one pimple into a cluster. Wait until the breakout has fully healed and the skin is flat before resuming gua sha over that zone. You can work around a breakout area by adjusting your stroke path to avoid it, but do not cross over active inflammation.
The second situation is a rosacea flare. Rosacea-prone skin is already in a state of heightened vascular reactivity, and the mechanical pressure of gua sha can trigger more flushing and redness during a flare. If your rosacea is in a calm, managed state with no active flushing, light gua sha at minimal pressure is generally fine. But if you are flaring, give your skin a few days to settle before reintroducing the tool. When in doubt, check with your dermatologist if you have any diagnosed inflammatory skin conditions. Gua sha is a supportive practice, not a medical treatment.
A $10 tool that depuffs your face in 4 minutes before you leave the house.
The BAIMEI Rose Quartz Roller and Gua Sha Set includes both tools covered in this guide: the gua sha stone for jawline, cheeks, and brow work, and the small roller for the under-eye zone. It is the set I recommend to every client who asks me what to start with. Thousands of verified Amazon reviews back up the results.
Amazon Check Today's Price on Amazon →